
|
 05-06-2011, 05:58 PM
|
#1 |
|
Gone Wild
Join Date: Mar 2011
Location: Long Island
Posts: 181
|
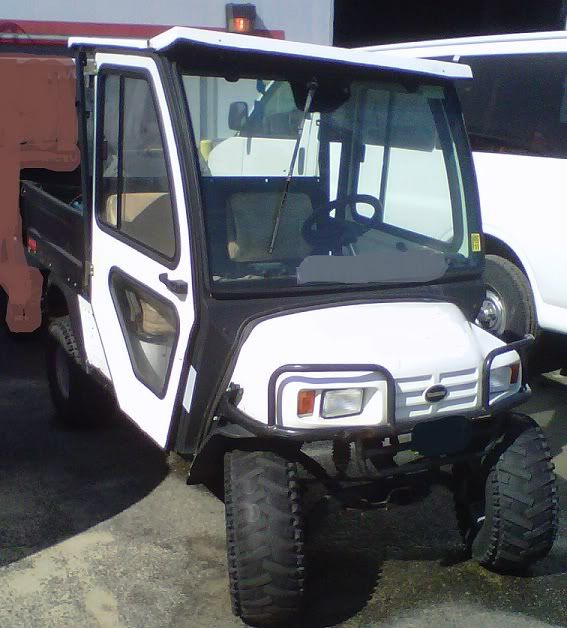
I'm starting my build threat today. Not doing anything crazy. Just beautifying the cart a little. Heres what I had to start with. Two carts-one for parts.
  I am looking for tips, tricks and constructive criticism. This is my first build and I'm learning. |

|

|
 Today Today
|
|
|
__________________
This advertising will not be shown in this way to registered members. Register your free account today and become a member on Buggies Gone Wild Golf Cart Forum |
|
|
05-06-2011, 06:03 PM
|
#2 |
|
Gone Wild
Join Date: Mar 2011
Location: Long Island
Posts: 181
|
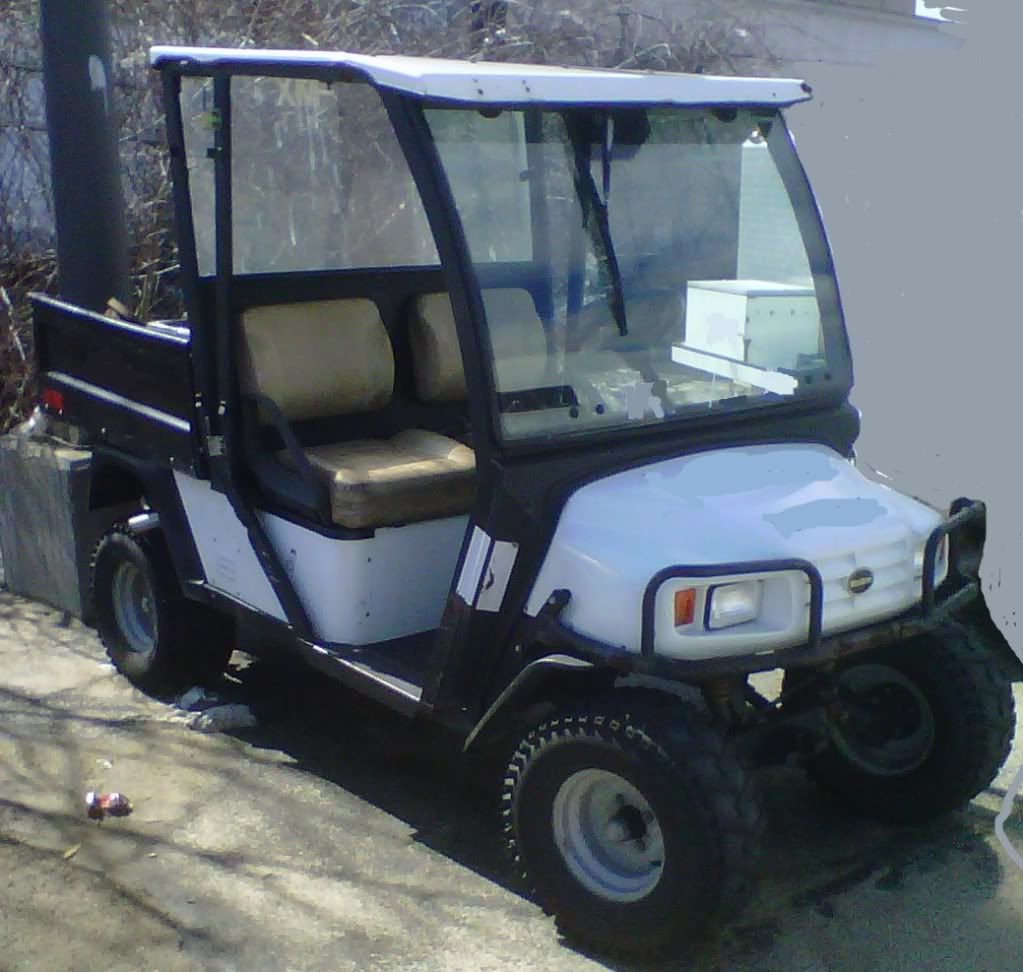
Here they are in the driveway in various states of disassembly. The cart on the right runs. Everthing works - Dump bed, lights, locking diff. Needs a little TLC though.
  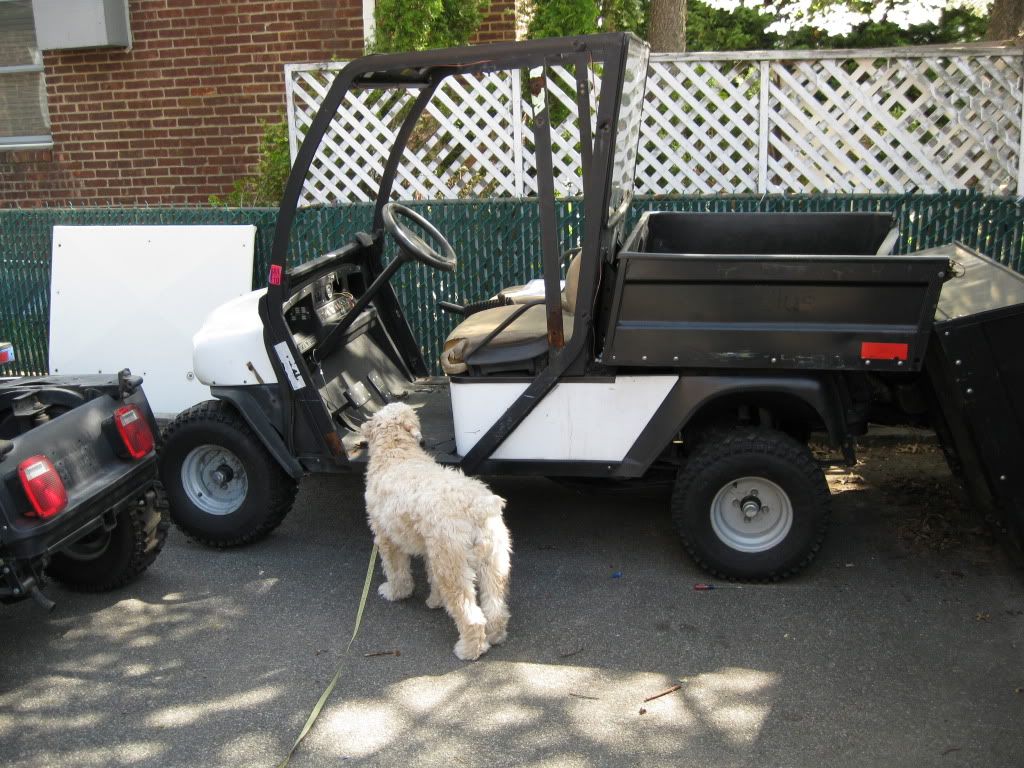 That's Bailey in the last pic, she is my helper. |
|
|
|
|
05-06-2011, 06:17 PM
|
#3 |
|
Gone Wild
Join Date: Mar 2011
Location: Long Island
Posts: 181
|
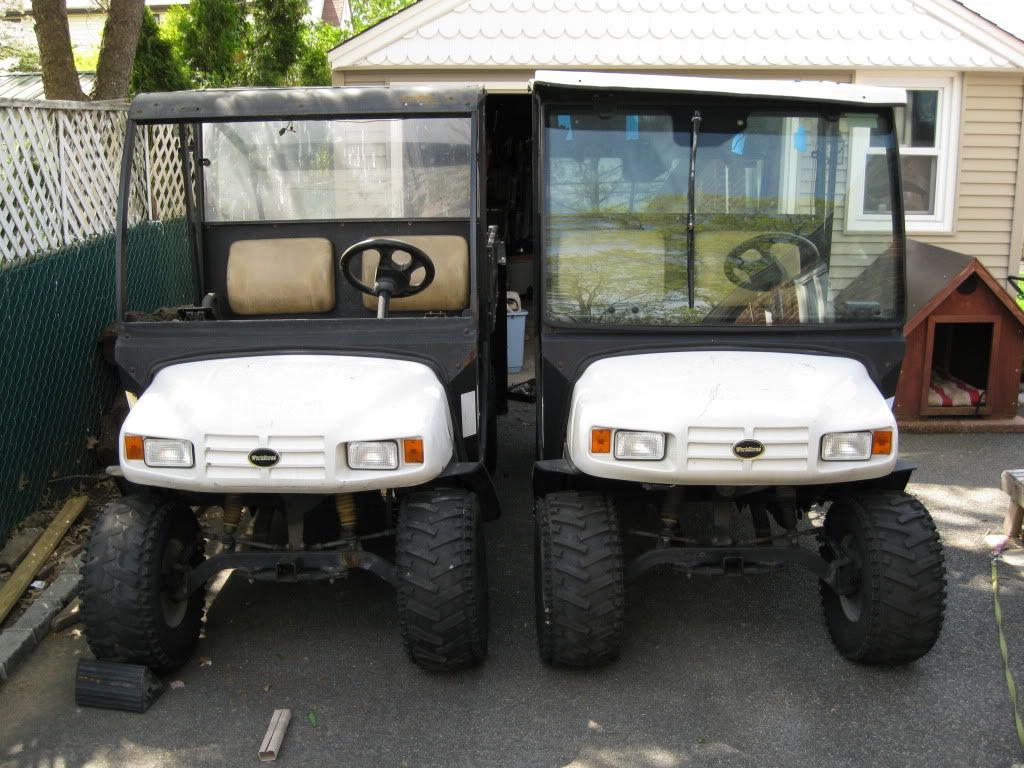
My first order of business today was to swap the front axle under the springs. The was easy enough. Although, the tie rods are hitting the springs.
HERE IT IS BEFORE: 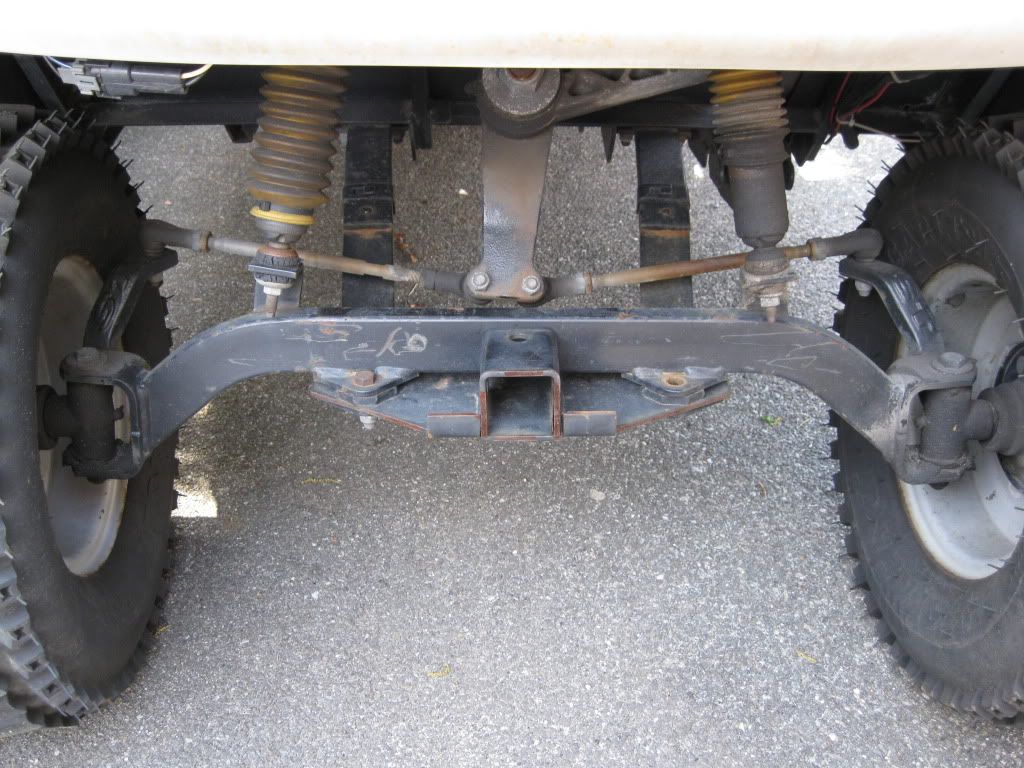 HERE IS THE AFTER SHOT: 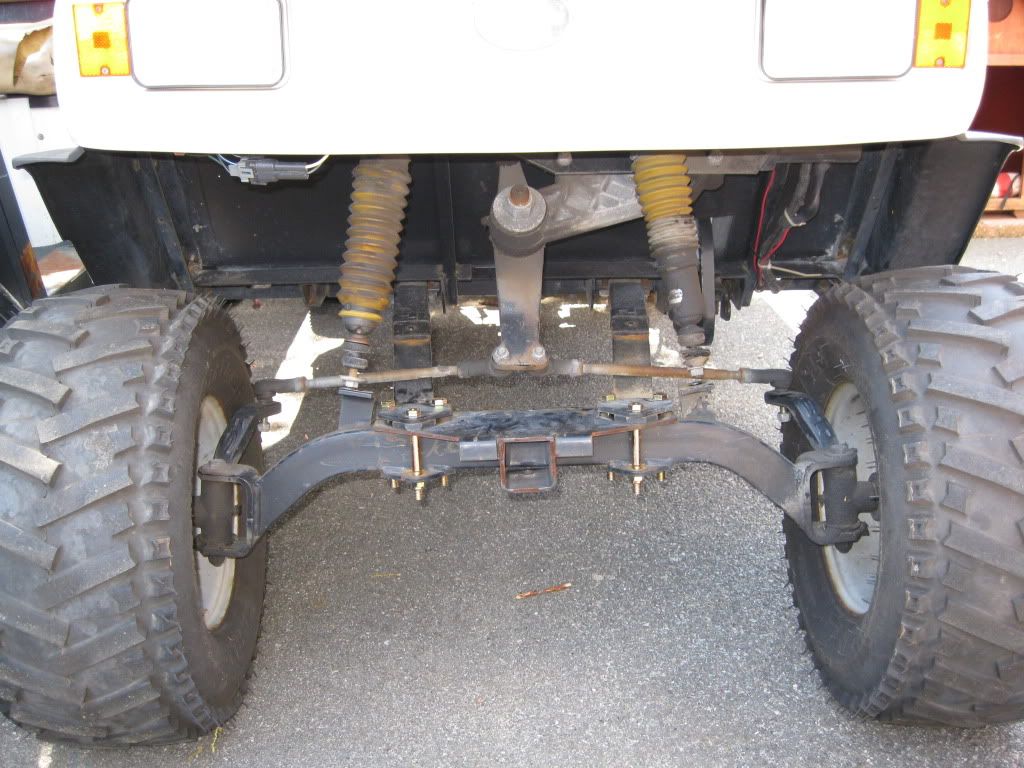 The tie rods are touching the springs 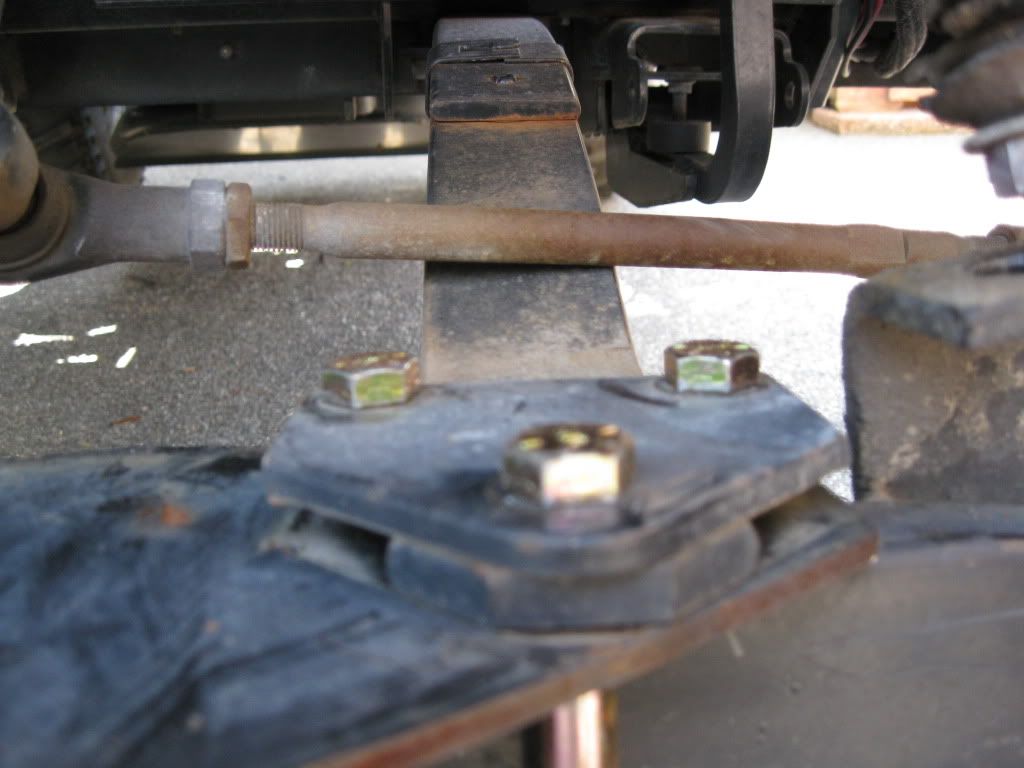 To try and correct that I placed a 1/2" steel spacer between the chassis and spring in the rear. 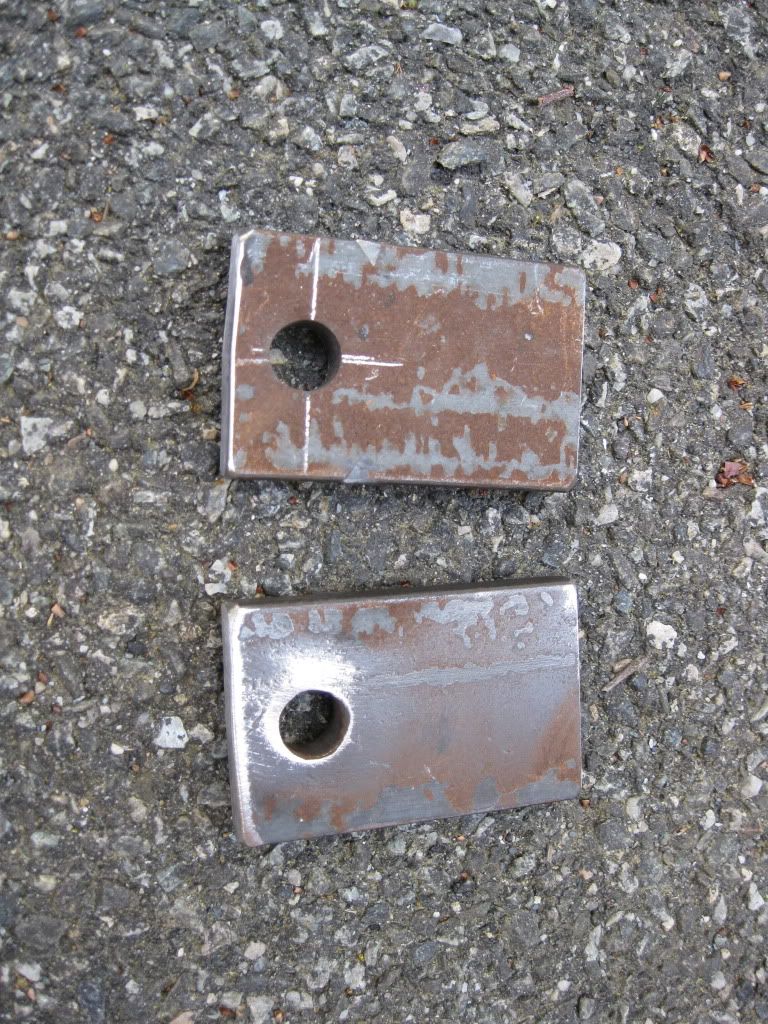 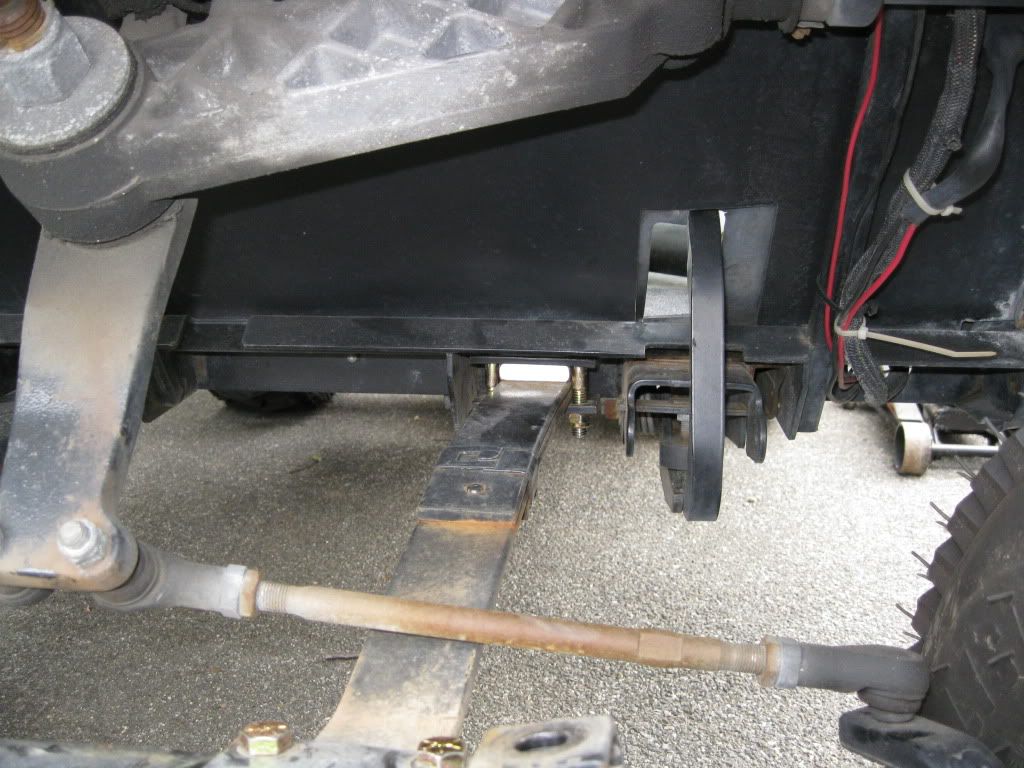 Here they are installed. I ended up placing another spring plate in there as well for 3/4" total lift in the rear. Only helped a little. Here is what it looks like compared to the other cart. 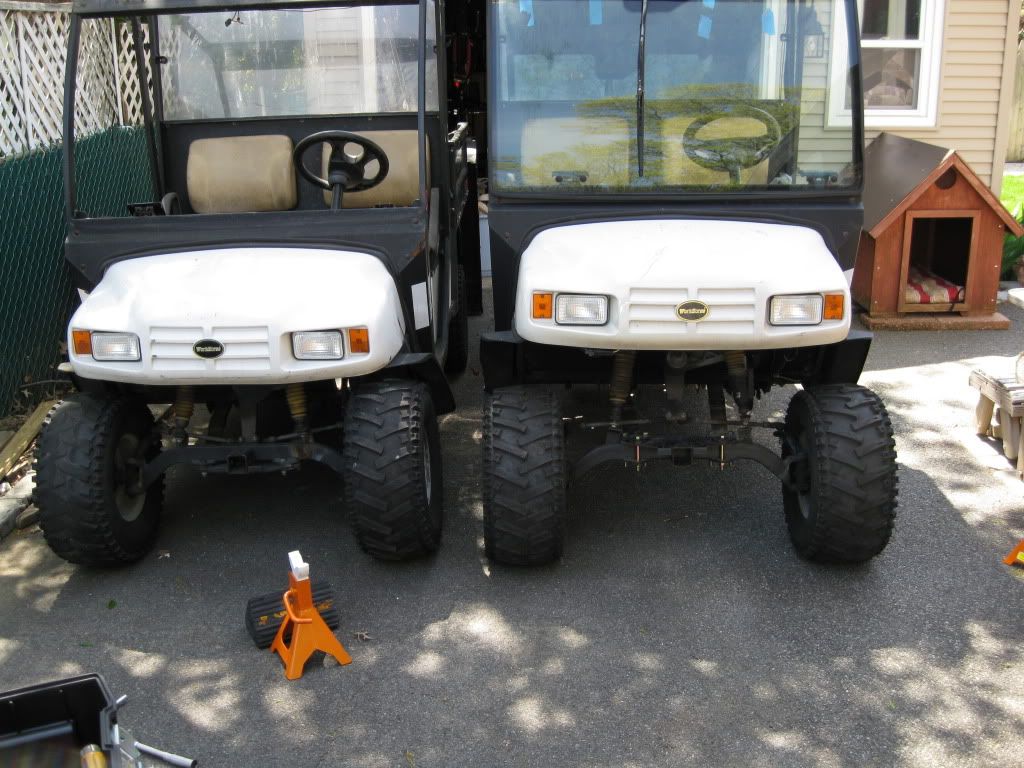 Now I need to think about putting the axle over the springs again and maybe placing a 2" square tube in the rear so that i may keep my steering geometry. Is there anyway of making the axle flip work? Does anybody know of a suitable shock to replace the shorter version? I will use shock extenders as a last resort. |
|
|
|
|
05-06-2011, 06:26 PM
|
#4 |
|
Gone Wild
Join Date: Mar 2011
Location: Long Island
Posts: 181
|
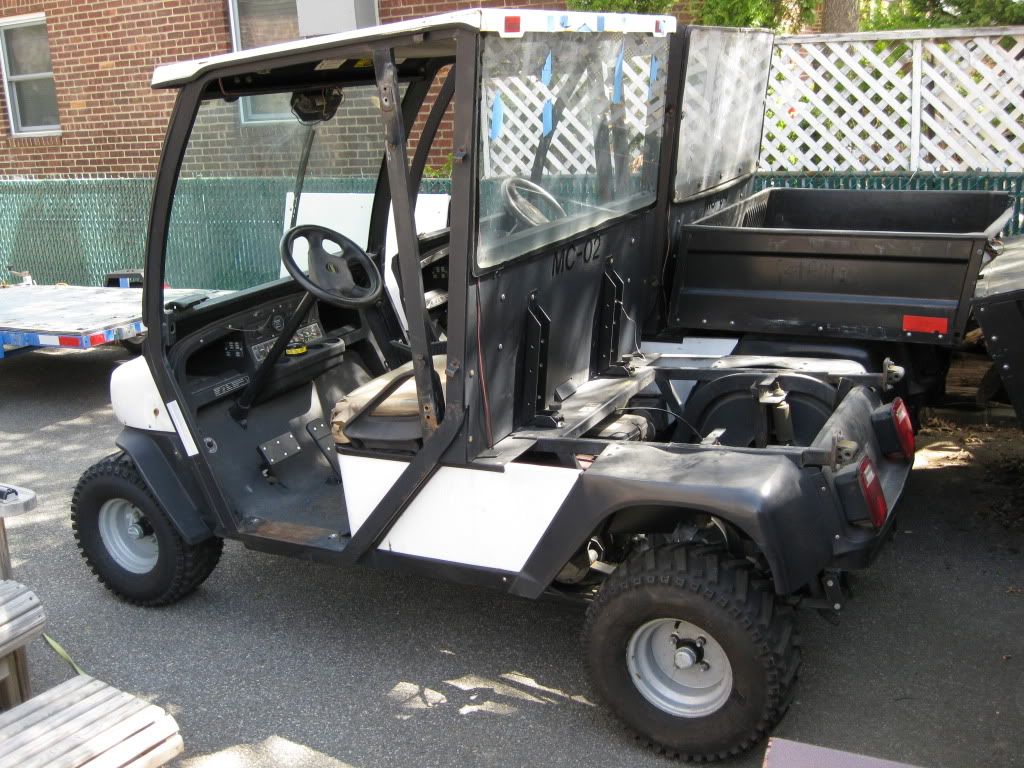
I am removing the cab from one cart so that I can restore the cage. I plan on putting on a bimini top and have the rear window removable as wel, using DZUS fasteners. The windshield actually vents open on the bottom, like a safari window on a VW bus.
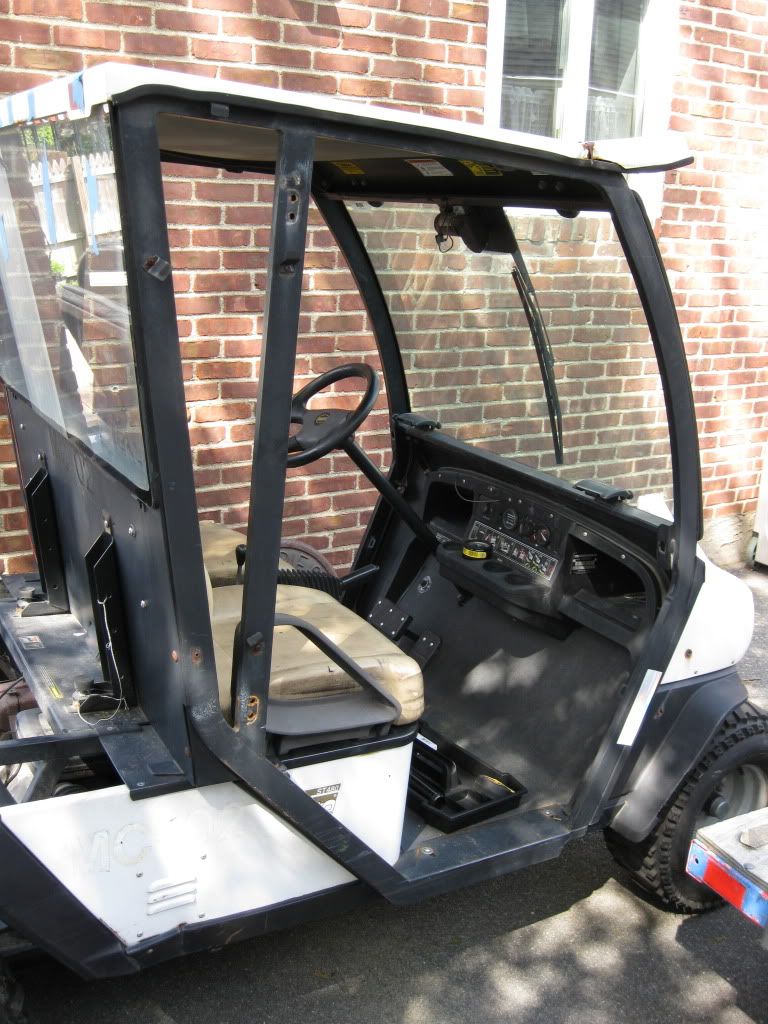 This cart has the windshield and roof removed. I will grind off the rust and repaint. 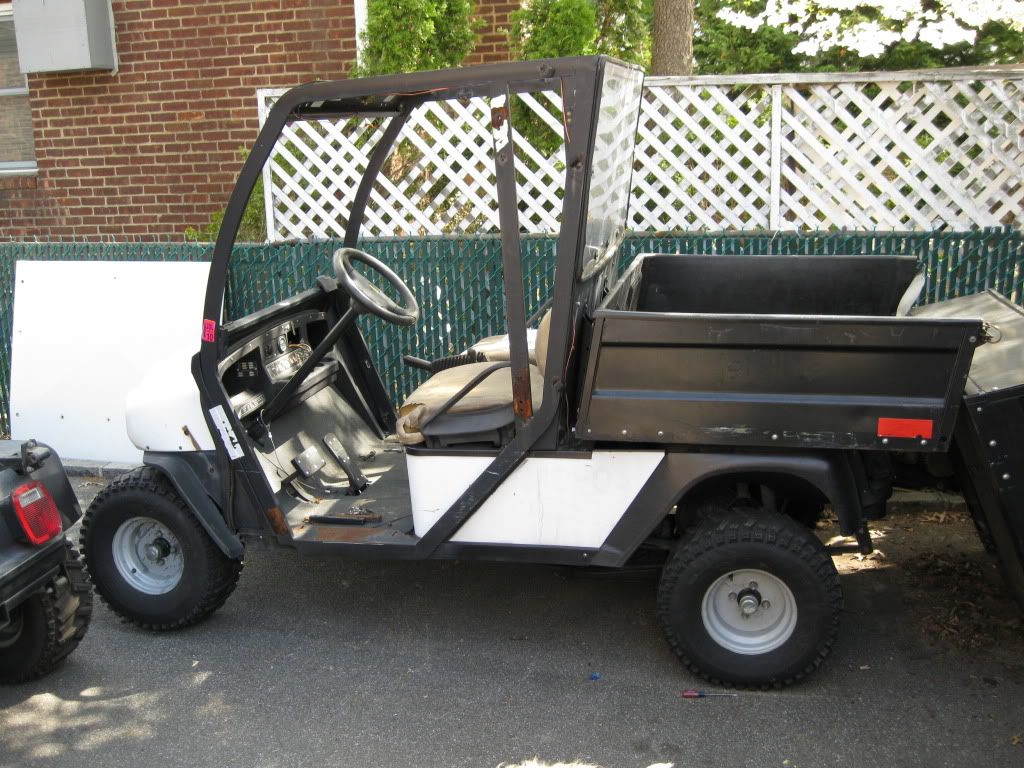  Here is a before and after of the lift:  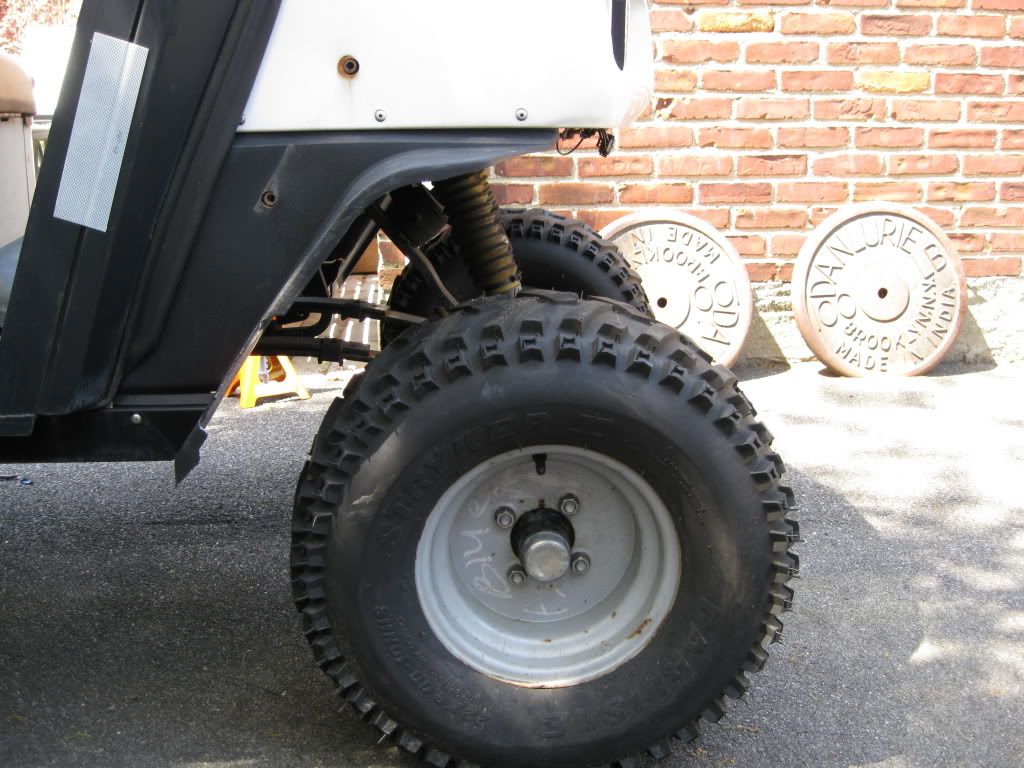 |
|
|
|
|
05-06-2011, 06:32 PM
|
#5 |
|
Gone Wild
Join Date: Mar 2011
Location: Long Island
Posts: 181
|
Remember, I am looking for tips, tricks and constructive criticism. This is my first build and I'm learning.
|
|
|
|
|
05-06-2011, 06:51 PM
|
#6 |
|
Gone Wild
Join Date: Mar 2011
Location: Long Island
Posts: 181
|
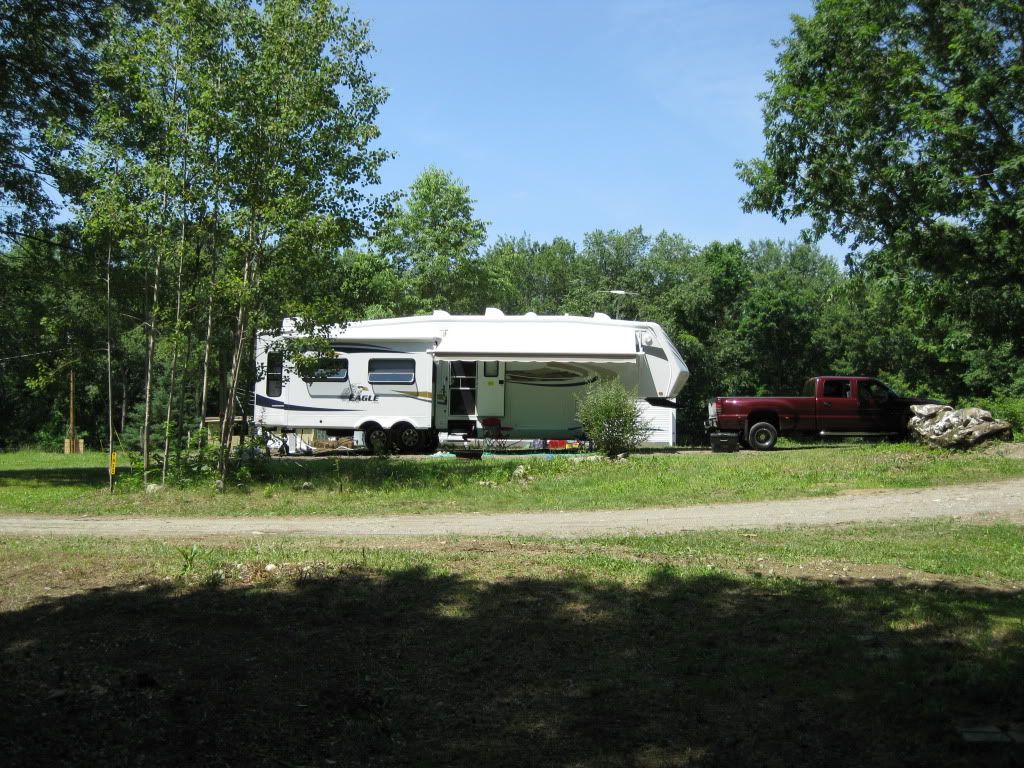
This is where it is going to end up living. I have no where to drive it at my house.
 |
|
|
|
|
05-06-2011, 09:11 PM
|
#7 |
|
Gone Wild
Join Date: Jan 2011
Location: Nebraska
Posts: 665
|
First, I am no mechanic. So anything I say should be agreed to by someone with a lot more experience before you think about it.
I had a similar problem with my tie rod ends hitting the springs. After looking at your pictures, could you flip the tie rod end on the inside and attach from the top instead of the bottom. You may have to lengthen them a bit, but it should give you clearance. Remember, I'm no expert and this may not be a good idea. Let's see what others say. If it would be ok, I think I may do that myself. I put my springs on my axle, and my welding shop guy gave me 4 solid steel plates 1/2 inch thick to gain me another inch. Unfortunately I could only use 1 because I was hitting the springs. |
|
|
|
|
05-06-2011, 09:46 PM
|
#8 |
|
Gone Wild
Join Date: Mar 2011
Location: Long Island
Posts: 181
|
Thanks Reinman, I was thinking the same thing. I couldn't get the joints off. Pounded the heck out of them with a two pound hammer. I need to get a pickle fork. Looks like another trip to Harbor Freight.
|
|
|
|
|
05-07-2011, 05:40 AM
|
#9 |
|
Gone Wild

Join Date: Mar 2010
Location: Eminence, IN
Posts: 534
|
the problem with they way you did that suspension is when you are in it and that spring flexes it will hit that tie rod again. It needs to either go UNDER the spring or WAY over the spring
|
|
|
|
|
05-07-2011, 06:53 AM
|
#10 | |
|
Not your usual outlaw
 Join Date: Oct 2008
Location: Near Lake Geneva, WI
Posts: 20,054
|
Quote:
Without seeing the rear axel, I'm guessing you dont have the cast housings with the rubber in them?? If you do, just flip it, put your 2" tube in and get longer square u-bolts. You can find almost any size u-bolts you may need at; http://www.mcmaster.com/#u-bolts/=c7755b If you dont have the housings and it's just u-bolted to the leaf. Just flip it and get longer u-bolts for the correct length (get them longer than you need and cut them). You will need to swap the backing plates for the brakes (left to right side) to relocate the the cable pulls because they will be in the way. Either way, you will need to either buy new (longer) shocks or you can order these from Shop Ez-go, http://www.shopezgo.com/products/Bas...-Isomount.html and use the stock shocks. I did it both ways, but prefer the base plate from ez-go and stock shocks. You can use the attached from Monroe to find a suitable longer shock. Measure the distance you need and find shock that'll work with the "S4" designation for the "stud" type mount. This is what mine looks like with the base plate.  Good luck! Let me know if you need anything else. This post is wordy, but it's really simple to do. |
|
|
|
|
 |
|
||||||
|
|
 Similar Threads
|
||||
| Thread | Forum | |||
| The 05 GT build | Members Rides | |||
| EZGO Build Block Build - CPP kit, Allsports LT | Big Block Talk! | |||
| My 93 E-Z-GO Build | Gas EZGO | |||
| GEM car build | Extreme DC! | |||
| (3 48v build | Electric Club Car | |||


 Linear Mode
