 |
|
|||||||
| Design Center Shop tools, fabrication and Paint and Body |
|
|
Thread Tools | Display Modes |
|
|
#1 |
|
Gone Wild

Join Date: Feb 2009
Location: Ontario
Posts: 280
|
*2016 Update*
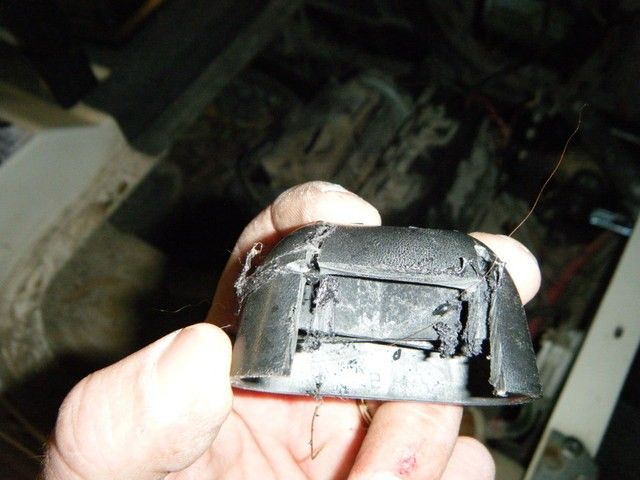
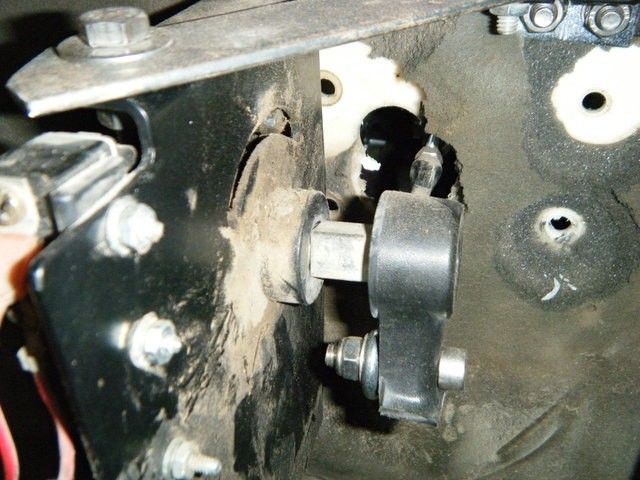
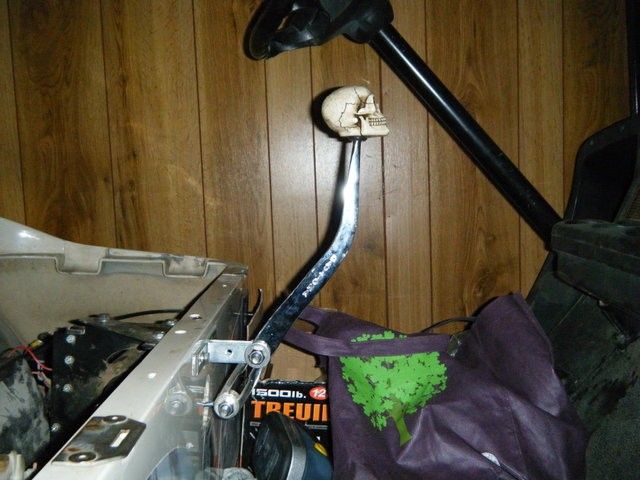
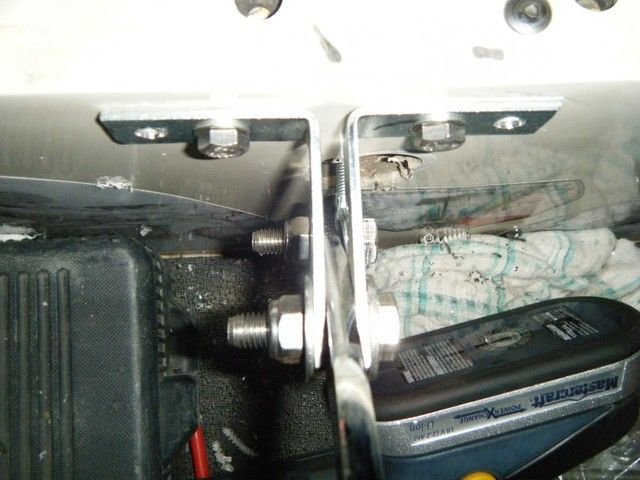
This Shifter held up for 6 long years, both on and off road. Never required any additional maintenance, tweaking, or anything. Cart has since been sold, and yet another build will commence. I lost numerous photo's on the last host/server site, so I have replaced any lost pictures with extra's to at least give an idea. If anyone requires any additional information, then please just ask. I would be more than happy to help out. With that being said...... What an honor to have another "Sticky" Thread on such a wonderful forum!!! Please take the time to add you Custom Shifter Builds, and comments in order to help aid future DIY Cart Addicts!  OK guy's.... Here is the build specs for those of you interested. I apologize about missing some pics., but will answer any questions you may have. The build was always meant to be done with minimal tools, and budget in mind. Besides your basic hand tools....wrenches, screw drivers, rubber mallet, the only other tools I used where a drill, and grinder. Here is my Parts List, and cost. (Canadian Funds) > Chrome Shifter Arm $6.00 (Ebay) > Skull Shifter Knob $9.13 (Ebay) > Shifter Boot Cover $6.12 (Ebay) > Angle Brackets X2 $2.34 (Canadian Tire) > Turnbuckle (Round End) $2.79 (Canadian Tire) Total Out of Pocket > $26.38 Additional Parts from around the house... 10- 6mm Bolts 2- 10mm Bolts 1"x6" Flat Bar Alum. Flashing 5"x16" (approx.) I first started by removing the shifter handle by removing the retaining screw. Then remove seat, and top mounting bolts for shifter mechanism. Turn mechanism, and reinstall one bolt. Measure and cut flat bar to length for support bracket, and bolt on. This gives you your basic set up for the shifter. (Sorry original picture has been lost, but this should give an idea)  Take plastic handle and cut with grinder (cut off disc). Take note on back side as to molded in structual supports. You want to leave them on the handle portion, and not the cut off piece.  (Missing original 2nd picture) Carfully drill hole so that it is even on internal gussets, and mount your turnbuckle using a bolt with washers on either side of turnbuckle loop end. You will probably need to shim between the bolt and eye of turnbuckle to take out he excesive play. For this, I found a brass collar from an air line fitting kicking around, andused grinder to shape it to width. On the other end I used a plastic air line clip as the spacer/collar, after cutting it to length, and width. You could use anything you have kicking around, or perhaps your bolt fits nicely in the eye of the turnbuckle. (Missing Original 1st picture)  I opted for the turn buckle, as It took the guess work out of lengths, and had the eye ends for ease of mounting. Be sure to use a jam nut on one side of the turnbuckle to lock it in place after finding correct length. You will see this illistrated in the next few pics. Next, I had to drill a hole in my lever to attach turnbuckle. I chose the closest to the botom, as I wanted it stand stand up tall like a Rat Rod shifter. Drill hole, and mount with bolt. Using collor/bushing to take out slop/play. Here I simply used a plastic air line clip, and cut it to length and width with side cutters to fit. Be sure to use washers on both sides of eye. Tighten down until tight, then back off so lever swivels freely. Turnbuckle to lever mount can be seen in pic. below. (Original picture missing)  After turnbuckle is mounted to lever. I used existing hole to mount the "L" brackets to upper portion of lever. I used existing hole on the "L" brackets for mounting, and cut extra length off. Tighten untill slightly snug. This will help hold the "L" brackets from swinging, as you line everything up. Mount can be seen in picture below...  For easy of mounting I pre-cut and drilled the "L" brackets on the body mounting end as well. I basically cut half the length off. Do not throw out the cut offs though, as they can be used on the back side when mounting, to give the plastic body a little extra support. When lining up your desired angle, you may find it neccesarry to make the hole on the body a little bigger to avoid contact/restrictions. I simply drilled multiple holes to obtain this. You could use a hole saw, but I wanted to use an item everyone should have. Regardless.... When lining everything up, you basically want to hold the "L" brackets at there desired location, then turn turnbuckle to get desired angle of shifter. Mark two "L" bracket hole locations, then relax shift lever, and make your drill holes, and do any cutting required in lower plastic. Mount lever with the two bolts, and loosen the lever/"L" bracket slightly so it pivots freely. Here you can fine tune the turnebuckle to get the exact angle desired, and check for any binding, or restrictions. Take not that you may want to angle lever slightly forward to clear seat when putting in reverse. Once you have desired angle, tighten down jam nut on turnbuckle, and drill and install two remaining bolts. Be sure to use the bracket cut-offs as mentioned earlier, or alternative to keep plastic from future stress, and damage. Here are a fem pics. of mounted lever, jam nut, and all aligned up... |
|
|

|
|
||||||
|
|
 Similar Threads
|
||||
| Thread | Forum | |||
| Custom Rear Seat Build | Design Center | |||
| Custom Cart Build!! | Lifted Golf Carts | |||
| Custom Shifter (Thread Approval) | Design Center | |||