Hi guys

I actually saved that thing I wrote... don't know why, but now I'm glad I did


Preparation:
To begin with removing the body, we need to make that possible by removing some things first:
Top - Remove each of the 4 bolts. The head is a Phillips head, and use a #2 Phillips screwdriver to hold them (preferably a short handle). Use a 7/16" socket to remove the lock nuts. Save the hardware by putting it all in a bag (Including the plastic spacers), and labeling it for the appropriate section.
Front Top Support - This is a one piece support, so its best to remove the lower two bolts first and rotate the entire piece so that it rests on the seat. Use a 1/2" socket w/ratchet to remove each of the 4 bolts. Again, save the hardware in a bag.
Rear Seat Back Support Frame - Instead of removing the rear top supports, we can save a few extra steps. At the base of the seat back supports, you will see 4 bolts. Use a 9/16" socket, and remove each one. They can be difficult to remove, and they are long bolts so be ready to put some grunt into them. An Air ratchet works very well, if you have access to one. Once those bolts are removed, you may now remove the framework, which includes seat back and all.
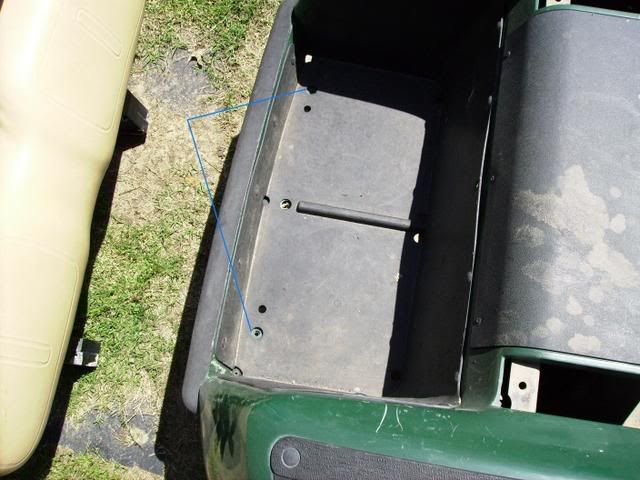
Reference Picture:
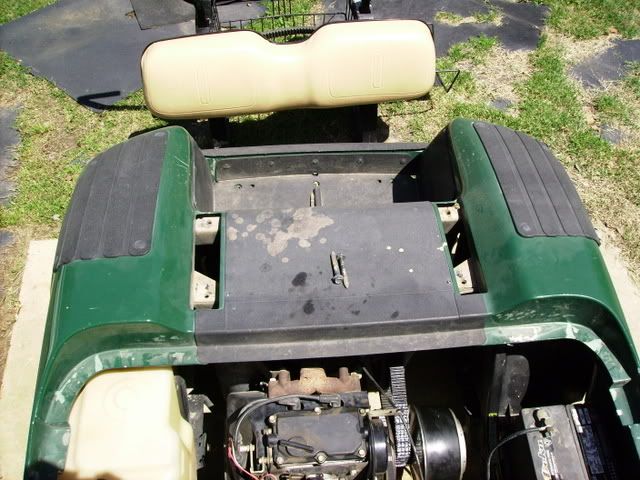
Rear Access Panel - You will see a black plastic cover in the middle of where the rear seat back support frame was. That panel has 5 screws holding it in place. Use a #20 torx bit to remove each screw. Don't forget to bag and label everything .
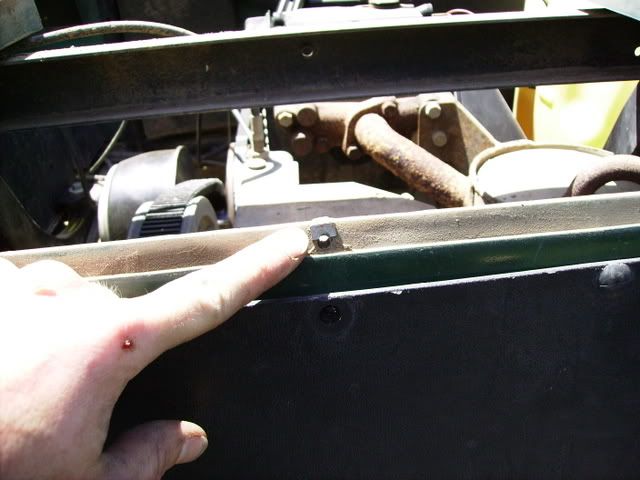
*** SAVE THIS 'J' CLIP***

FRONT COWL
-First things first, we must remove the rocker panels and sill plates.
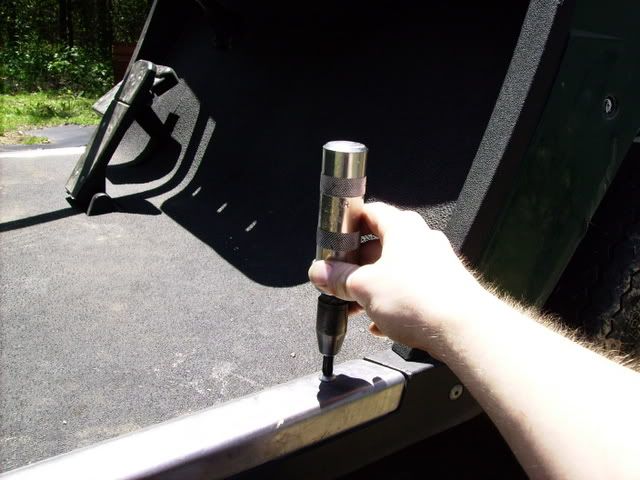
Sill Plates - Start by removing the sill plates. These are the stainless steel covers just at the entryway to the golf car. There are two Phillips head bolts on each plate. Use a screwdriver and a 7/16" combination wrench to remove each one. You may need to soak them down with WD-40 for several hours first. If one breaks, you can get a replacement from your local dealer.
Reference Picture (My method
)
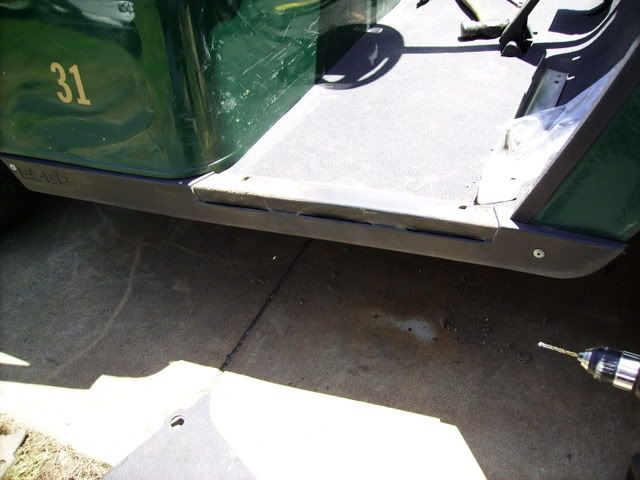
Rocker Panels - There are two rivets on the rocker panels, drill those out with a 3/16" drill bit. Then gently, but firmly, pull the rocker panels free. They are held on by friction locks (once rivets are removed).
Reference Picture:
Front Cowl - With the rocker panels removed, we have now exposed the lower most rivets that hold each lower side of the cowl in place. First we need to start at the front and work our way back.
Name Plate - Right behind the name plate are two snap nuts on the mounting studs. You can use a small, flat blade screwdriver to remove these. If they prove to be troublesome, you can use a pair of dikes to remove ONLY the snap nut. The name plate can now be removed, thereby exposing the two rivets beneath it. Drill those two rivets out with the same 3/16" drill bit.
Reference Picture:

Lower Cowl Rivets - The rivets that were revealed earlier by removing the rocker panels may now be drilled out. I prefer to use a small pickle fork to get behind the body and remove the rivet. If you plan on reselling or using the cowl, you can drill out the head of the rivet and use a 3/8" punch to remove the body of the rivet.
Upper Cowl Rivets - Now, we can finish removing the cowl. Along the seating side of the cowl, you will see many rivets. Drill out each one, alternating sides. This way when you get to the last one in the middle, you can hold the cowl to prevent it from falling to the ground.
REAR BODY
Now the fun begins . This is the section that will take the longest to remove.
Seat Hinge Plates - After removing the seat from the car, you will notice the hinge plates that hold the seat on the car. Each one has two rivets that need to be drilled out with the same bit from earlier. There is also one rivet between each plate, right above the shift handle. Drill that out also.
Floorboard Rivets - Pull up the floor mat, starting at the rear body and pull to front of car. You will now see 5-6 rivets holding the lower ledge to the frame. Drill each of those out, same 3/16" drill bit. These rivets like to spin, if they do that then drill the heads off. Then use a 1/4" punch to remove the bodies after removing the rear body.
Side Rivets - Just in front of the rear wheel wells, you will see two 1/4" stainless steel rivets on each side. These were hidden by the rocker panels. Trying to drill these out is hopeless. The best method for removing them is to use a chisel and hammer. Remove the head of these, and use a punch to remove the rivets' bodies. Remove all 4 of these lower rivets this way.
Rear Bag well - There are two drive rivets to be punched out. These are located in each corner of the rear section of the bag well. Use a 1/4" punch to remove the pin. Then pull the rivet up by hand, and save the pin for reuse.
Reference Pictures:
You can now remove the entire rear body.
Now, finally she's naked
Have fun with your project(s), and I hope this has helped you out.
Bob